
Joomla
Follow the steps below to set up the plugin for your Joomla website.
Joomla plugin setup
- Download the Joomla Plugin. You will have to install it on your Joomla website.
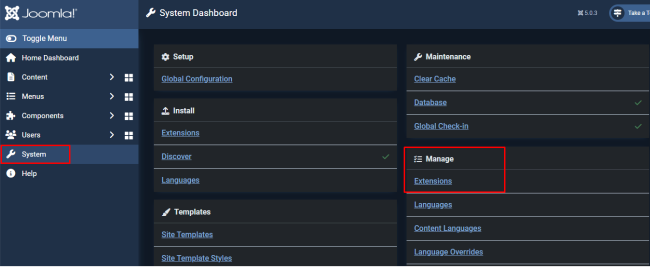
- Login to your Joomla website admin panel. Open System > Manage > Extensions page:
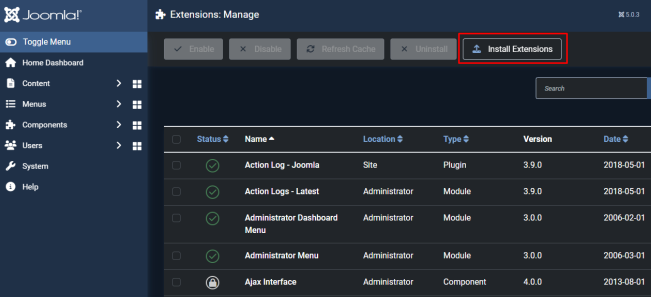
- Press the Install Extension button:
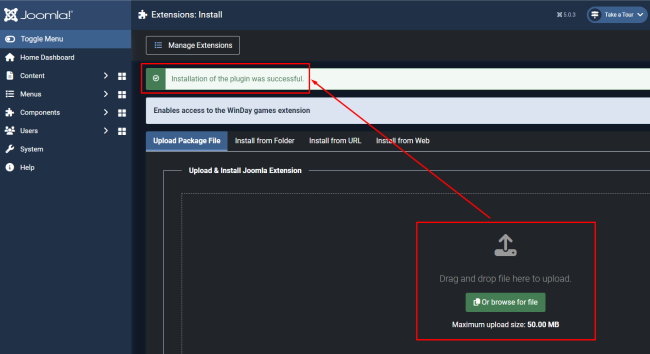
- Drag and drop the zipped plugin into the upload area or click a corresponding button to upload the file. After the fine is uploaded, you should receive an “Installation of the plugin was successful.” message.
- Then, go to the Manage Extensions and search for a Winday plugin. You will see that the plugin is installed, but not enabled. Press the “crossed” gray button to enable a plugin:
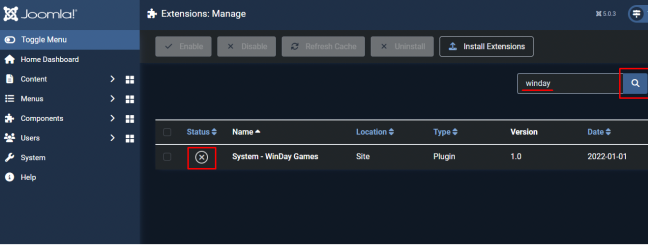
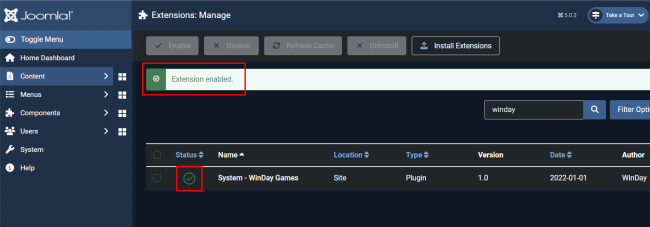
- After it's clicked, it turns to green, enabled state:
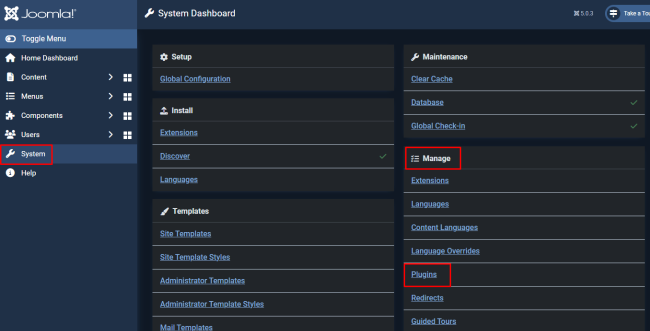
- Then, go to System > Manage > Plugins and find a Winday plugin using search:
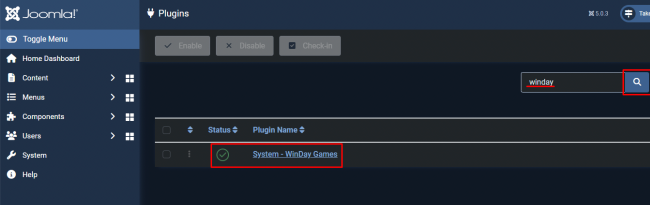
- Click the plugin name to open a settings page.
There are 3 tabs which are: General settings, Desktop Settings, and Mobile settings.
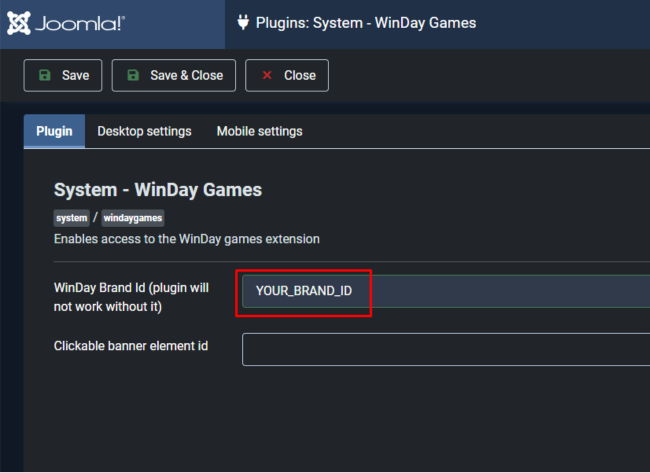
In General settings, you need to paste your Brand ID:
- Return to the Add New Website popup and copy your Brand ID:
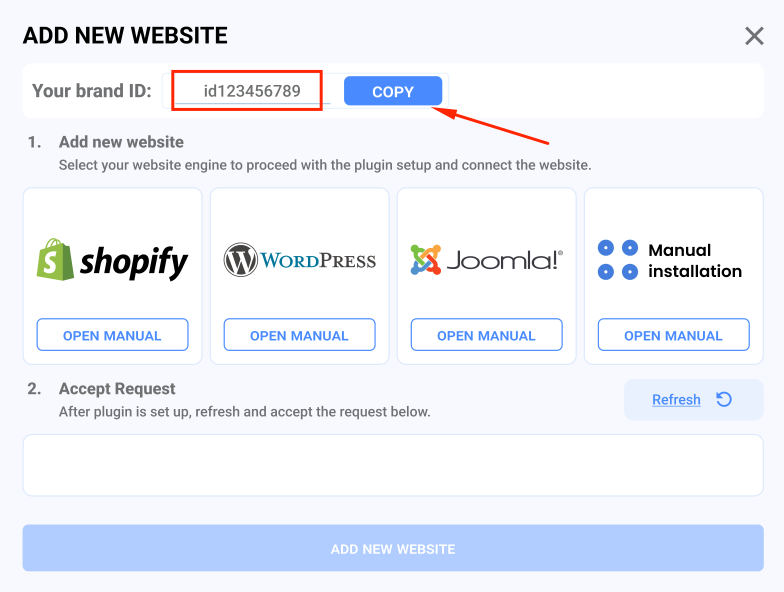
- Go back to the Joomla panel and paste your Winday Brand ID into the General Settings tab.
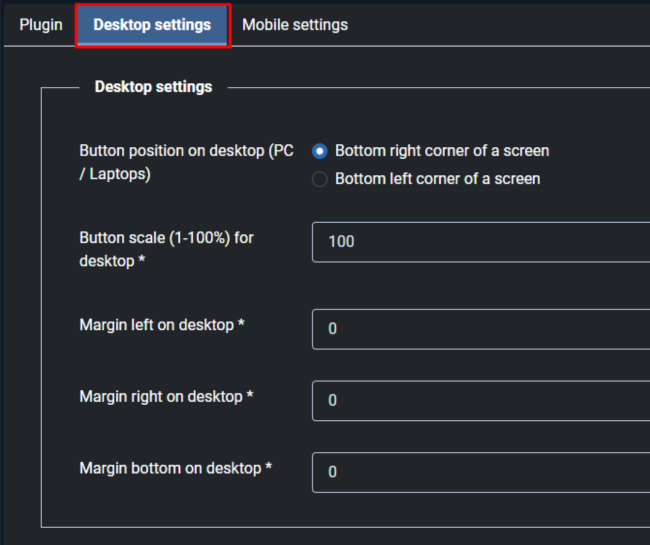
- In Desktop settings tab, there are additional settings that are optional and provide additional adjustments for the plugin appearance on the website from desktop devices:
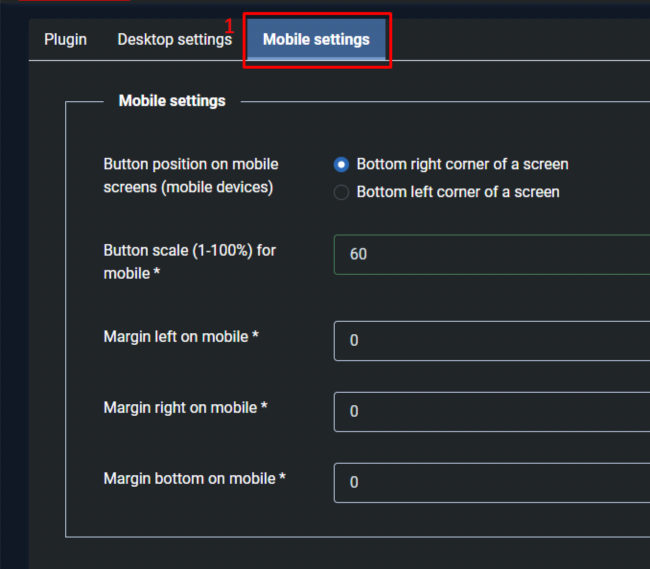
- Mobile settings tab is also optional and provides additional adjustments for the plugin appearance on the website from mobile devices:
- Click the Save button. The request will be sent to verify your website:

- Close the Joomla admin panel and open your website.
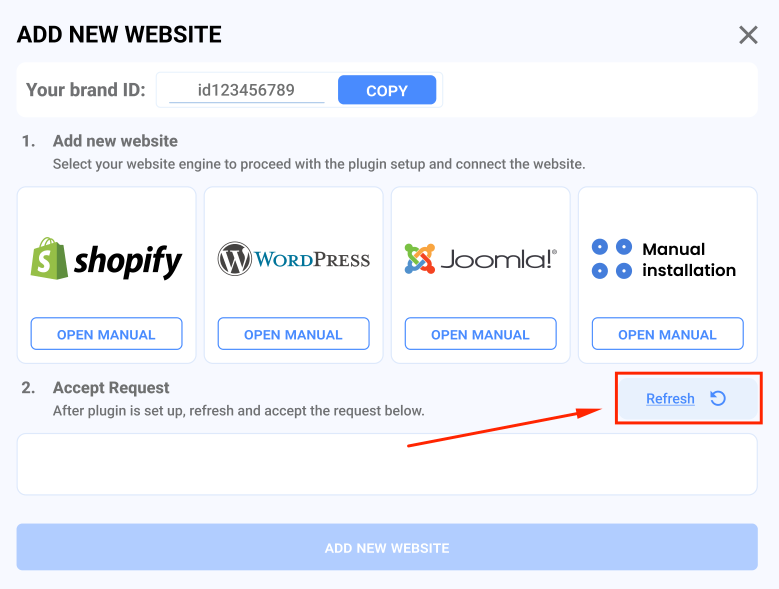
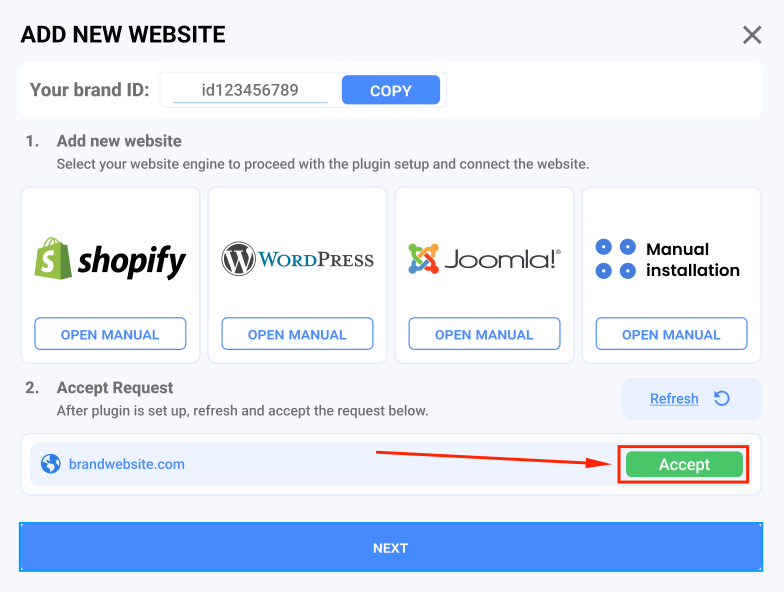
- Return to the Add New Website popup in the Brand Panel and click the Refresh button. Your website should appear in the list below:
- Click the Accept button next to your site address to complete the synchronization. Then click the NEXT button below to finish:
Now, the plugin button should appear on your website.